Transform an Antique Dresser Into a Kitchen Island

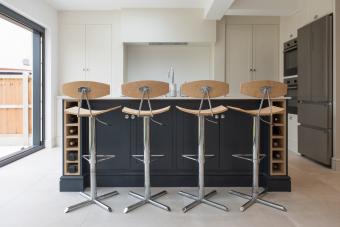
Create a Dual-Purpose Wine Storage Kitchen Island

Make Yourself a Simple Rustic Kitchen Island

DIY Kitchen Islands That'll Be the Star of Your Kitchen

© 2025 LoveToKnow Media. All rights reserved.
Make the most of your space with these DIY kitchen island ideas.
Megan's contributed both writing and research to a myriad of associations including academic publications, cultural institutions, non-fiction works, and experimental collaborative projects.
Read MoreLearn about our Editorial Policy.

Everyone's found themselves holding a kitchen knife in one hand, vegetable in the other, desperately whirling around for some counter space that isn't already covered. Times like these are where we kick ourselves for not already putting in a kitchen island. Don't worry about paying thousands of dollars to get a custom kitchen island installed. Instead, try putting together one of these DIY kitchen islands for culinary spaces of all shapes and sizes.

If you're looking to add some refinement to your kitchen décor, then you can thrift an antique dresser to use as your kitchen island. These work best in mid-size to larger-sized kitchens and are easiest to install when they're made to be a permanent fixture.
Simply, find a dresser you vibe with, clean it up with a dust rag, and replace the dresser's top with something more food-friendly. You don't even have to remove the top, you can just wood glue or use another adhesive to affix a butcher block slab.

Get crafty by taking a miniature pie safe you scored from grandma or from the flea market and turn it into a new kitchen island. Depending on its size, a pie safe kitchen island can fit both small and big kitchens well. If they don't come with wheels, you don't have to convert them, but it's always an option to give you some movement if you've got a kitchen with some serious square footage.
These kitchen islands do so much more than serve as a place to rest your elbows or cut your ingredients. You've got a built-in baked goods warmer right there. Keep your baked goods and freshly made dinners warm in your new pie safe kitchen island.

If you've got an overflowing wine collection, then this DIY kitchen island idea is perfect for you. Screw together a few wood boards, paint them, and affix either edge with narrow vertical shelves for your wine bottles. So long as you've got your measuring tape, a power drill, and wood, you can put it together.
Sand it and add a coat of paint to finish it off. Then top it with a countertop that works best for you (butcher block, stone, etc.).

If you're not that handy with a toolbox, then a simple kitchen island made out of a few 2x4s and wood planks should do the trick. Measure out how wide and tall you'd like your island before cutting your wood planks and beams to size. Whether you just want to put a sealant, stain, or paint on it, make sure you do this before attaching all the pieces together.
From there, simply build your frame using a few screws, and screw in however many shelves you'd like. Really customize it by screwing in some hooks, utensil holders, or dish towel racks to maximize its usefulness.

Mix textures with this industrial and wooden DIY kitchen island. You can buy a pre-made metal frame or screw your own together. Measure the size you need in butcher block and pick out a wood grain that connects with you. Don't forget to stain and seal your butcher block, so that it's fully food safe and protected from spills. Drop the butcher block into your frame and set it up wherever you'd like.
You can also make yours a little longer to create a new area for you and your family to eat, work, craft, and more.

If you love giving old goods new life, then you'll jump at the chance to create this retro kitchen island. Now, this one might take you some time to source all the materials for, but it's well worth the wait. All you need is some lumber and two old bottle cooler doors.
As the doors already come with hinges, all you need to do is build the frame for them to be attached to. Close off the non-cooler door sides or leave them open for easier access. Then, attach a big butcher block on top and you're ready to go.

If you live in an apartment or a tiny home, then you know exactly how small kitchens can get. They're one of the first places that are downsized if square footage is an issue. Yet, that doesn't mean you shouldn't get the chance to enjoy a kitchen island.
The best kind of kitchen island for a small kitchen isn't just small, but also portable. Wheeled islands can be stored out of the way until they're needed and even used for other situations around the house. One way to DIY a mini island is buying a huge square wood block and attaching a base with caster wheels to it.

Great for outdoor kitchens, wood slat islands keep things simple and functional. Whether you want a dark wood or a light, you can source lumber of all kinds. Unlike other wooden kitchen islands, this one can be made entirely out of wood slats. Simply pick up a handful of them at the hardware store, and measure the dimensions that fit your space. Cut the frame pieces for each leg out, as well as for the bottom and top slats to be screwed into. Then, cut and affix the slats.

Many kitchens don't come with a built-in island, and if you want to expand your counter space and give yourself somewhere else to eat and guests to mingle, then making one yourself is a great idea. Get inspired by these DIY kitchen islands and put together the centerpiece furniture of your dreams.